THE MAKING OF MUD BRICK

PREPARATIONS
As discussed in the introduction, a typical mud brick recipe includes clay for adhesion and mass, sand to improve compressive strength and reduce shrinkage, and fibre such as straw for binding and tensile strength. The group conducted a couple of soil tests to determine the ratio of clay to sand present in the soil that we intended to use for the bricks. This test helps to determine if and how much additional sand is required.


In addition to sand and clay, a typical mud brick mix includes a fibrous organic material such as hay, pine needles or pea straw to help hold the materials together, improve tensile strength and prevent cracking. Our mud brick recipe included straw.
Waterproofing
To improve waterproof capacity of the mud brick, lime, asphalt and/or cement are commonly added to the mix. As stated, this project is being carried out on a team member’s family property, and after the project is completed, the wall will be dismantled and crushed or repurposed for garden works. In order to have the least impact to the land and vegetation we are building on, the group decided not to use any of these additives as lime, asphalt or cement runoff could be harmful to future productivity of the soil. For the purpose of this project the dense clay bricks should provide adequate waterproofing, without the need for admixtures.
So, after testing and a bit of research, the group determined a simple recipe of 2 parts clay rich soil, one part sand, and one part straw.
Brick size and moulds

A crucial element in the production of the bricks is the brick mould. According to the government website yourhome.gov.au a typical mud brick is 300–375mm long, 250–300mm wide and 1100-125mm high, and can weigh up to 18kg. Single skin mud brick walls should be a minimum of 250mm in depth in order to achieve adequate structural thickness, and 300mm to provide effective thermal mass. Based on this information we designed out bricks to be 300x250x125mm and, using discarded/off-cut timber and film-face ply wood, constructed 2 moulds of 5 bricks, fixed together with self-taping screws. The moulds after use can be dismantled an repurposed, or perhaps hosed off and used as shelving in the shed or garden.
MAKING THE BRICKS
Preparing the brick mix
On site, the group dug a small trench in the clay rich soil to act as a big mixing bowl for our mud brick solution, adding ingredients incrementally at a ratio of:
• 2 parts soil
• 1 part sand
• 1 part straw
• Approx 1 part water, or as needed to achieve the desired consistency.
This approximate ratio of water to solid materials produces what is known as a dry mix.
 |
 |
 |
 |
 |
 |

Forming the bricks


We then levelled off the top of the brick by raking the straight edge of a timber off-cut against the top edge of the moulds, moistening the surface as we raked to ensure a smooth, level finish. The underside of the brick will moulds to the ground beneath it. This is why a level ground on which to set the bricks is ideal.
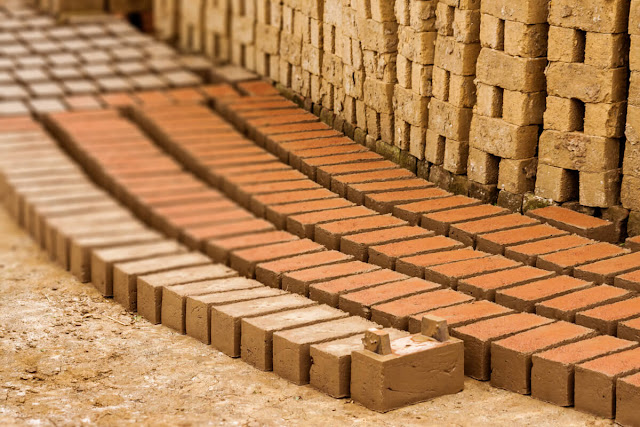
 After each of the moulds was filled, we removed the moulds by levering them up gently with a spade, then lifting them vertically, taking care to remain level so as not to warp the wet brick. The moulds came off relatively smoothly, leaving uniform rows of 5 bricks with a 2cm gap between each for air circulation.


Resource consumption and environmental impacts
So far, this project was largely human powered with manual labour using hand tools. A few electrical tools were used at this stage of the process- namely a small cordless drill used to drive the screws into the moulds and (with mixer attachment) blend the mud brick mix, and a bench saw to cut the off-cut and recycled timber to size for the moulds.
As discussed previously, we chose to leave out any admixtures from the brick mix and instead using the materials in the rawest form available to us. Omitting additives from the mix mitigates the greenhouse emissions and embodied energy resulting from the production and refinement of material such as cement, asphalt or Bondcrete.
The greatest consumption of fuel and power was in the transportation of people, tools and materials to the building site. A more central site and car pooling where possible would have alleviated some of this fuel consumption.
A considerable amount of water went into both the brick mixture and the continuous clean-up required.
As discussed previously, we chose to leave out any admixtures from the brick mix and instead using the materials in the rawest form available to us. Omitting additives from the mix mitigates the greenhouse emissions and embodied energy resulting from the production and refinement of material such as cement, asphalt or Bondcrete.
The greatest consumption of fuel and power was in the transportation of people, tools and materials to the building site. A more central site and car pooling where possible would have alleviated some of this fuel consumption.

Text by Mary Walbrook
Photos by Alex Tomas, Melina Vlastou and Mary Walbrook
References: www.Yourhome.gov.au


Comments
Post a Comment